The newest and best pedals in the Thrustmaster lineup are the T-LCM models. Thrustmeter’s T-LCM pedals have a top-notch load cell sensor, which is a first for them. It indicates that they accurately detect and transfer the force you exert.
The Thrustmaster LCM pedals set, which is versatile and stable, offers users several advantages when racing: the pedals can be adjusted. A set of 6 springs allows for a wide range of adjustment options. The unit is made entirely of non-slip metal, and the settings of the pedal set can be changed using the included software.
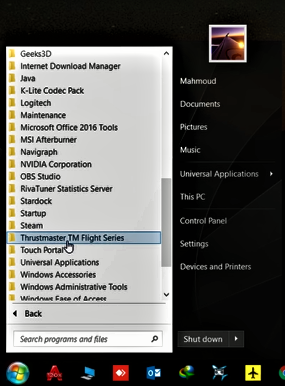
Thrustmaster TM sim pedals work with Xbox One, PlayStation 4 consoles, and PCs running Windows 10/8/7. This article will give you more information about the TM sim pedals calibration tools.
Thrustmaster Tool Calibration Requirements
TM Sim Pedals Calibration Tools Requirements are the following:
- Create and keep up with written processes.
- Establish the accuracy standards for the measurements to be made.
- Choose a measurement tool that can use to make accurate and precise measurements.
- Identify and describe the calibration measuring instrument.
Smart Tool Calibration Procedure
The practice of comparing the output of metrology equipment to recognized standards is known as precision calibration. Technicians can check your equipment’s accuracy and performance using this comparative technique.
When a professional notices a difference between the output of your equipment and the known criteria, they’ll make changes to guarantee that the equipment once again produces accurate outcomes.
The fundamental procedure for calibrating smart equipment is comparable because specialists will still contrast a tool’s findings with predetermined settings. However, a skilled technician is usually required because there are more components to consider when calibrating this equipment.
A CPU, sensors, a communication model, and electronics are just a few components that make smart tools. Calibration setup is typically difficult when there are all these components. You should, thus, contact a business that provides precision calibrating services.
Thrustmaster T LCM Pedals Setup
Here is the step by step set up for the Thrustmaster calibration tool for windows 10:
Step 1: Mounting and Connecting
The T-LCM pedals should be connected to your sim setup using the USB or direct wheelbase connection cable as soon as you have unboxed them. There is no need to purchase either outside the box because they are both included.
The braking module’s load cell sensors allow the pedals to have a class-leading maximum force of 100 kg. The screws on the underside of the metal pedal plate make attaching them to a sim rig as simple as connecting any other set of pedals, which must recommend making the most of this feature.
The RJ12 cable located at the back of the set, which can withdraw at any moment, should be used to connect your pedals in the best possible way. It should relate to the equivalent port on the back of your base. The USB cable directly linked to your PC must also be attached.
After basic base calibration, the MODE LED in the bottom left corner of every Thrustmaster wheel will blink 5 times to let you know they are properly connected and fully recognized by your wheel. It’s time to move on to the software step of setup so you can customize the pedals to your preferences once they are safely mounted and properly linked.
Step 2: Installing and Adjusting the Necessary Software
Before the TM sim pedals calibration tool download any new software, you should first ensure your current software is fully updated to ensure that your wheel recognizes the T-LCM pedals. According to Thrustmaster, this is a frequent problem if your software is out-of-date.
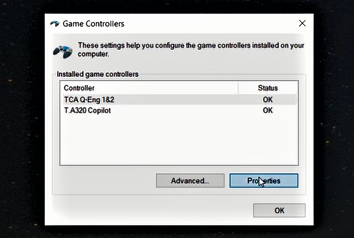
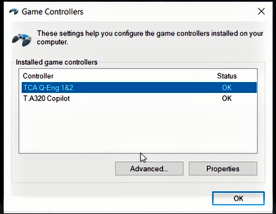
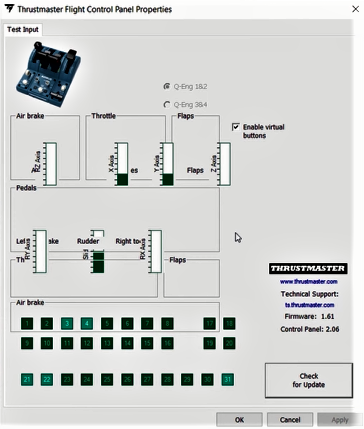
You should open your Thrustmaster Control Panel, which may download if you don’t already have it, and click Check for update in the window’s bottom right corner to verify the TM sim pedals calibration tool descarga.
It’s time to get the specific T-LCM software after you have verified or upgraded your firmware. Since this is where your pedals calibrate, it enables you to take full advantage of the customizability offered and is a further essential step in maximizing its use.
Three settings can modify with this software:
- The initial dead zones of all three pedals
- All three pedals have dead zones at their ends.
- The brake pedal’s electronic brake force
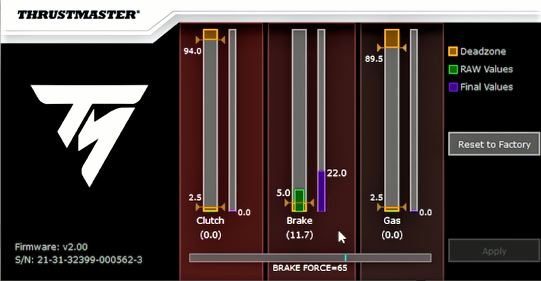
You could adjust the valves so that, for instance, 50% of the real power you saw was 100%. If you find it difficult to provide the energy to the pedal, this may come in handy.
Step 3: Finding the Available Springs
The adjustable brake spring is another of the Thrustmaster T-LCM pedals’ greatest features. It enables you to modify the brake pedal’s resistance so that it is softer or stronger.
To fully understand the range of default resistances, it is advisable to make this adjustment after the initial program configuration. 6 different springs include with the T-LCM pedals; each spring has an extra resistance and may combine with any other spring.
The six springs are available in 5 distinct colors:
- White: The least durable
- Dark grey: A softer, more even resistance
- Black represents a robust yet balanced resistance.
- Red – The hardest-hitting
- Silver: A pre-loading spring enables a softer spring.
The red, pre-loading, and black springs are put in place by default.
You also have two pairs of spacers, five washers, and this assortment of springs:
- Small metal discs, known as washers, can drop in the center of a pre-loading spring to disable it.
- Unmarked spacers: Disconnect the pre-loading spring from the three softer springs.
- Separate only the red springs from the pre-loading spring using the red-marked spacers.
Step 4: Selection and Installation of Your Springs
You may adjust the feel of your brake pedal using any of these 5 spring options to make it seem either gradually softer or harsher. Finding the ideal blend could require some trial and error. Still, professional racer David Perel and eSports driver Josh Martin of Coach Dave Academy advise using the strongest spring on the bottom and the black, third-most resistant spring on the top.
You only need to move to the back of your brake pedal, compress the spring, and move the attachment head in your direction to change your spring combination. You can separate the brake arm from the actual pedal mount and modify the holding rod’s springs.
When replacing the Thrustmaster pedal springs, keep in mind that you must:
- Use the spacers marked with red paint to separate the red springs from the pre-loading spring.
- Separate the pre-loading spring from the softer springs using the unlabeled spacers.
- Utilizing the T-LCM software, re-calibrate your pedals following a change in resistance.
- Once you have completed your final modifications, you can prepare to enter Assetto Corsa Competizione with the ideal settings for the renowned Thrustmaster T-LCM pedals.
Step 5: Internal ACC Mapping and Adjustments
Setting up your Thrustmaster T-LCM pedals inside Assetto Corsa Competizione completes the setup puzzle. In this case, mapping your braking input to the brake pedal is necessary. To achieve this, go to the Controls settings, locate the brake input, and click on it to activate mapping mode. All that’s left to do is depress the brake pedal, and you’re ready to go.
You may have noticed that there is also a Brake Gamma setting. However, this setting should remain at 1.00 because it is linear. The brake pedal’s sensitivity can, however, always increase.
What To Do If the Thrustmaster T LCM Calibration Tool Not Working?
You can check factory settings and the pedals work again. Then play a few races, reconnect to calibration, reset factory settings, and everything starts working again.
How Should My Thrustmaster Pedals Be Calibrated?
Directly attach your Thrustmaster steering wheel to the USB connection on your laptop or computer. Now, it will begin its calibration phase. Turn the racing wheel to the right until it stops when the calibration procedure is complete. Immediately place the steering wheel back in the center and hold it there.
Do LCM Pedals Function on the PS4?
The T-LCM Pedals’ resolution for PC games is 16 bits per pedal. Compatible with the Thrustmaster T-GT, T300, T150, TS-XW, TX, and TMX racing wheels and PS4 and Xbox One gaming systems.

With a background in mechanical engineering and over a decade in competitive sim racing, Kenji serves as our lead Sim Racing Physics & Hardware Analyst. He deconstructs complex topics like force feedback and suspension geometry, helping readers understand the crucial engineering behind a perfect lap time. Kenji’s passion is to translate real-world motorsport principles into actionable knowledge for the sim racing community.